




3-in-1 Uncoiler-Straightener-Feeder Operation Guide
 May 15, 2026|
 View:247
How to Operate a 3-in-1 Uncoiler Straightener Feeder: Step-by-Step Operation Guide
This operation guide explains how to operate a 3-in-1 feeder, also known as a 3-in-1 uncoiler straightener feeder or decoiler straightener feeder. As an integrated coil feeding machine, it combines uncoiling, material leveling, and automatic feeding to support efficient metal stamping production. The following steps cover coil loading, material threading, leveling, setup and adjustment, and synchronized operation with a punch press. Following the correct procedure helps reduce setup time, improve feeding consistency, and support safe machine operation.
Before starting, ensure that the work area is clear and follow the machine-specific safety procedures. Only trained personnel should operate the equipment, and all setup or adjustment work must follow the manufacturer's operating instructions. For help comparing different configurations, see our guide to 2-in-1 and 3-in-1 sheet metal feeders.
1. Loading the Uncoiler (Decoiler)
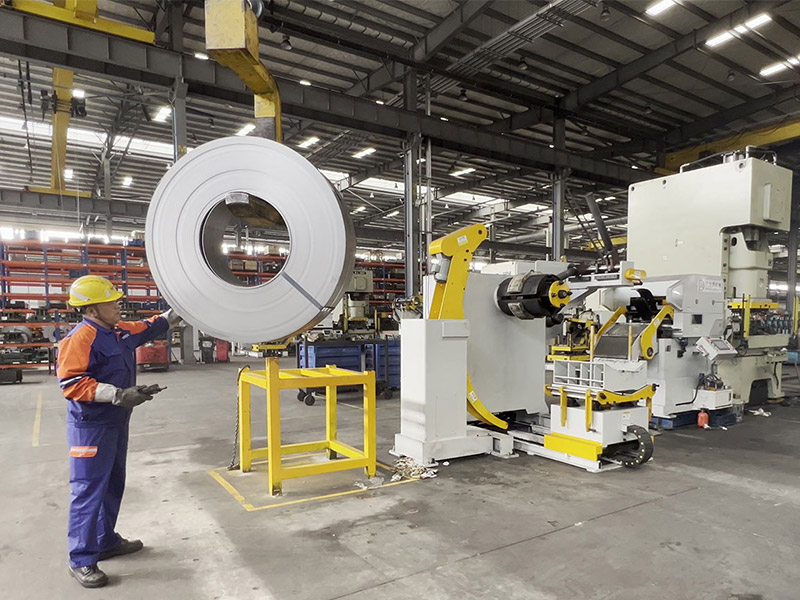
Before operation, switch the machine to manual mode. Raise the press arm and lower the support arm. Retract the material frame and adjust the inner and outer positioning arms so the coil aligns with the feeder's centerline. Use a suitable crane or mobile trolley to place the coil on the frame, positioning it close to the inner guide arm. Then expand the frame and lower the press arm. Finally, adjust the coil stops and support arms according to the machine instructions. Once the coil is properly secured, remove the packaging straps in accordance with the approved safety procedure. The coil is then ready for the threading process.
2. Threading the Straightener and Servo Feeder
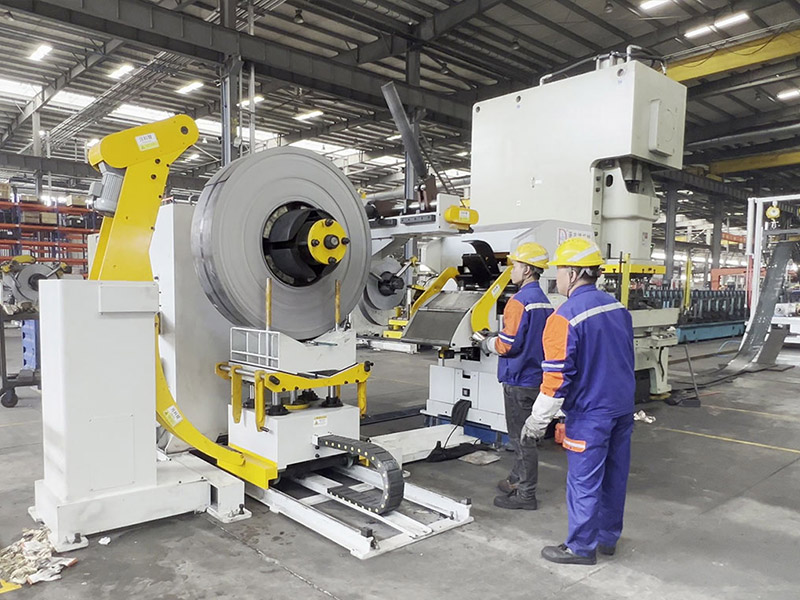
Raise the folding arm and open the leveling rollers according to the machine's operating procedure. Adjust the spacing of the entry guide rollers so the material can pass through smoothly. Rotate the material frame forward or backward to feed the material beneath the folding arm, then lower the arm to guide the strip into the leveling rollers. Fine-tune the roller settings and folding arm position until the material is correctly aligned with the feeding path and the material width. Lower the support arms to form a material loop, then switch the frame from manual to automatic mode as specified in the operating instructions. Use the jog function to observe the feeding motion and adjust the correction handwheel as required until the material exits smoothly and evenly.
Correct threading and leveling are essential to stable operation of a 3-in-1 uncoiler straightener feeder. During setup and adjustment, check that the material follows the intended path through the guide rollers and leveling rollers before proceeding to automatic feeding.
3. Automatic Operation with a Punch Press
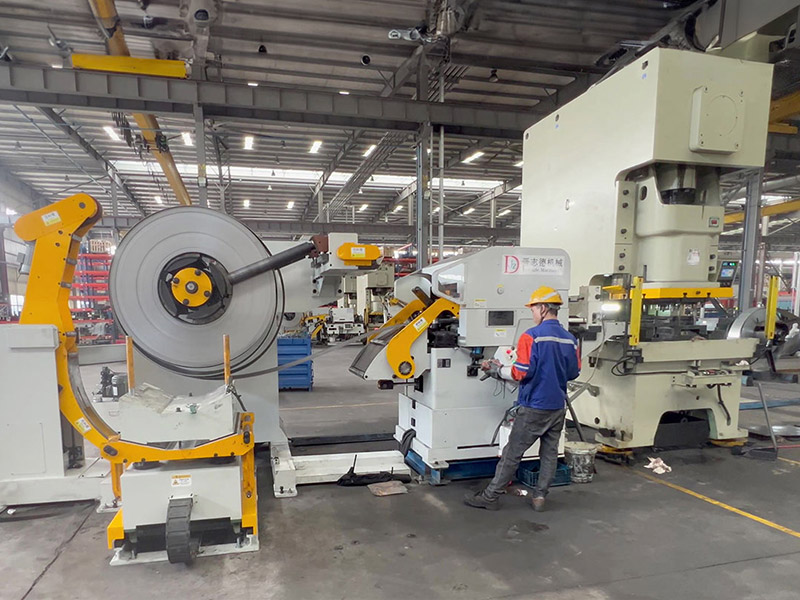
Before starting automatic operation, verify the required feed length and other production parameters against the workpiece drawing, tooling requirements, and machine documentation. Configure or confirm these settings using the control procedure specified for the installed model. Switch the feeder to automatic mode. Once the stamping press is ready and the feeder is correctly positioned, the OK light should illuminate as described in the machine instructions. Start the press according to the approved operating procedure, and the feeder will run automatically in synchronization with the press. For applications involving integrated automotive stamping line solutions, correct coordination between the feeding equipment and stamping press is essential. For safety, verify feeding motion in single-stroke mode before switching to continuous operation. Confirm that the material advances correctly before beginning stable production.
Correct feed length settings and synchronization help maintain consistent material positioning during stamping. If the actual feeding distance differs from the required value, stop the production process and check the relevant settings and operating instructions before making adjustments.
4. Setup and Adjustment Checklist
Before running a production batch, review the main setup and adjustment points for the coil feeding machine. The appropriate equipment arrangement and feeding direction can also affect installation convenience and daily operation. For more information, see our guide to the three layout options for a decoiler straightener feeder.
Coil Alignment: Confirm that the coil is properly positioned and secured on the uncoiler frame according to the machine instructions.
Material Threading: Check that the material passes through the intended guide rollers, folding arm, and leveling rollers.
Leveling Adjustment: Verify the leveling roller settings and material alignment using the specified procedure for the material being processed.
Feed Length and Parameters: Confirm the required feed length and other control settings against the production requirements and machine documentation.
Operating Mode: Verify the manual or automatic mode, press-ready status, and status indicators before starting the relevant operation.
The exact adjustment values and control procedures may vary by machine model, material thickness, and production setup. Always refer to the applicable operating manual rather than relying on general settings.
5. Basic Troubleshooting for a 3-in-1 Feeder
When operating a 3-in-1 uncoiler straightener feeder, issues such as uneven material tracking, interrupted feeding, or failed synchronization may affect production. The following checks provide a starting point for troubleshooting. For additional symptom-based checks, see our detailed coil feeder troubleshooting guide.
Uneven Material Feeding: Stop the machine and follow the required safety isolation procedure before inspection. Check the material path, coil alignment, and guide roller setup against the operating manual.
Material Skew or Inconsistent Leveling: Stop the equipment and verify the coil position, guide roller alignment, and leveling settings using the machine-specific adjustment procedure.
Incorrect Feed Length: Compare the required feed length with the configured control parameters and production specifications. Check the controller settings according to the manual before resuming production.
Feeder Does Not Synchronize with the Punch Press: Check the operating mode, press-ready status, and relevant status indicators. Consult the machine and press documentation if synchronization is not restored.
Never reach into the rollers or adjust machine components while the equipment is running. If a problem persists or requires work on electrical, hydraulic, or control systems, stop operation and contact qualified service personnel.
Conclusion
Following this operation guide helps operators manage coil loading, threading, leveling, setup and adjustment, and automatic feeding on a 3-in-1 uncoiler straightener feeder. Correct feed length verification, careful material alignment, and appropriate safety checks support reliable production and consistent material quality. For model-specific procedures and troubleshooting, always follow the equipment documentation and the guidance of qualified technical personnel.
Changzhou Jinzhide Machinery Technology Co., Ltd. provides metal stamping equipment and coil feeding solutions designed to support efficient material handling and automated production. Explore our 3-in-1 decoiler straightener feeder products to learn more about available equipment configurations and applications.